The Leonardo’s Girls Who Code Club learned computer science, received state competition awards and launched candy with a medieval siege weapon. All in 11 weeks.
Congrats to these hardworking students! In April, several of the girls entered the Utah STEM Foundation’s Entrepreneurial Challenge. In this challenge the section for 3rd – 5th grades clubs required essays which prompted them to reflect on technical aspects of code and what they believed was most important about from the Girls Who Code book. Additionally, the students were asked how they envisioned using code to change the world. All of The Leonardo’s Girls Who Code Club applicants were nominated for an award as well as the program’s lead educator. On April 25th Utah STEM hosted the Entrepreneurial Challenge awards ceremony. We are pleased to announce that the following winners from our club:
- Riley Lewis
- Vidushi Shelat
- Alyssa Sweeney
Job well done Girls Who Code! We are so excited to see how these future computer scientists will shape our community.
Utah Girls Who Code Challenge
Check out a recap of the STEM Entrepreneurial Challenge Awards Ceremony.
After a successful spring session and a truly impressive inaugural Girl Who Code Club, The Leonardo planned a special last day for the students. To celebrate their accomplishments the final lesson plan of Spring session included a little code, some math and a trebuchet. Now, you can use this lesson plan in your own STEM clubs or classrooms! Enjoy a little historical engineering with this coding club lesson.
The Leonardo’s Girls Who Code Trebuchet Celebration
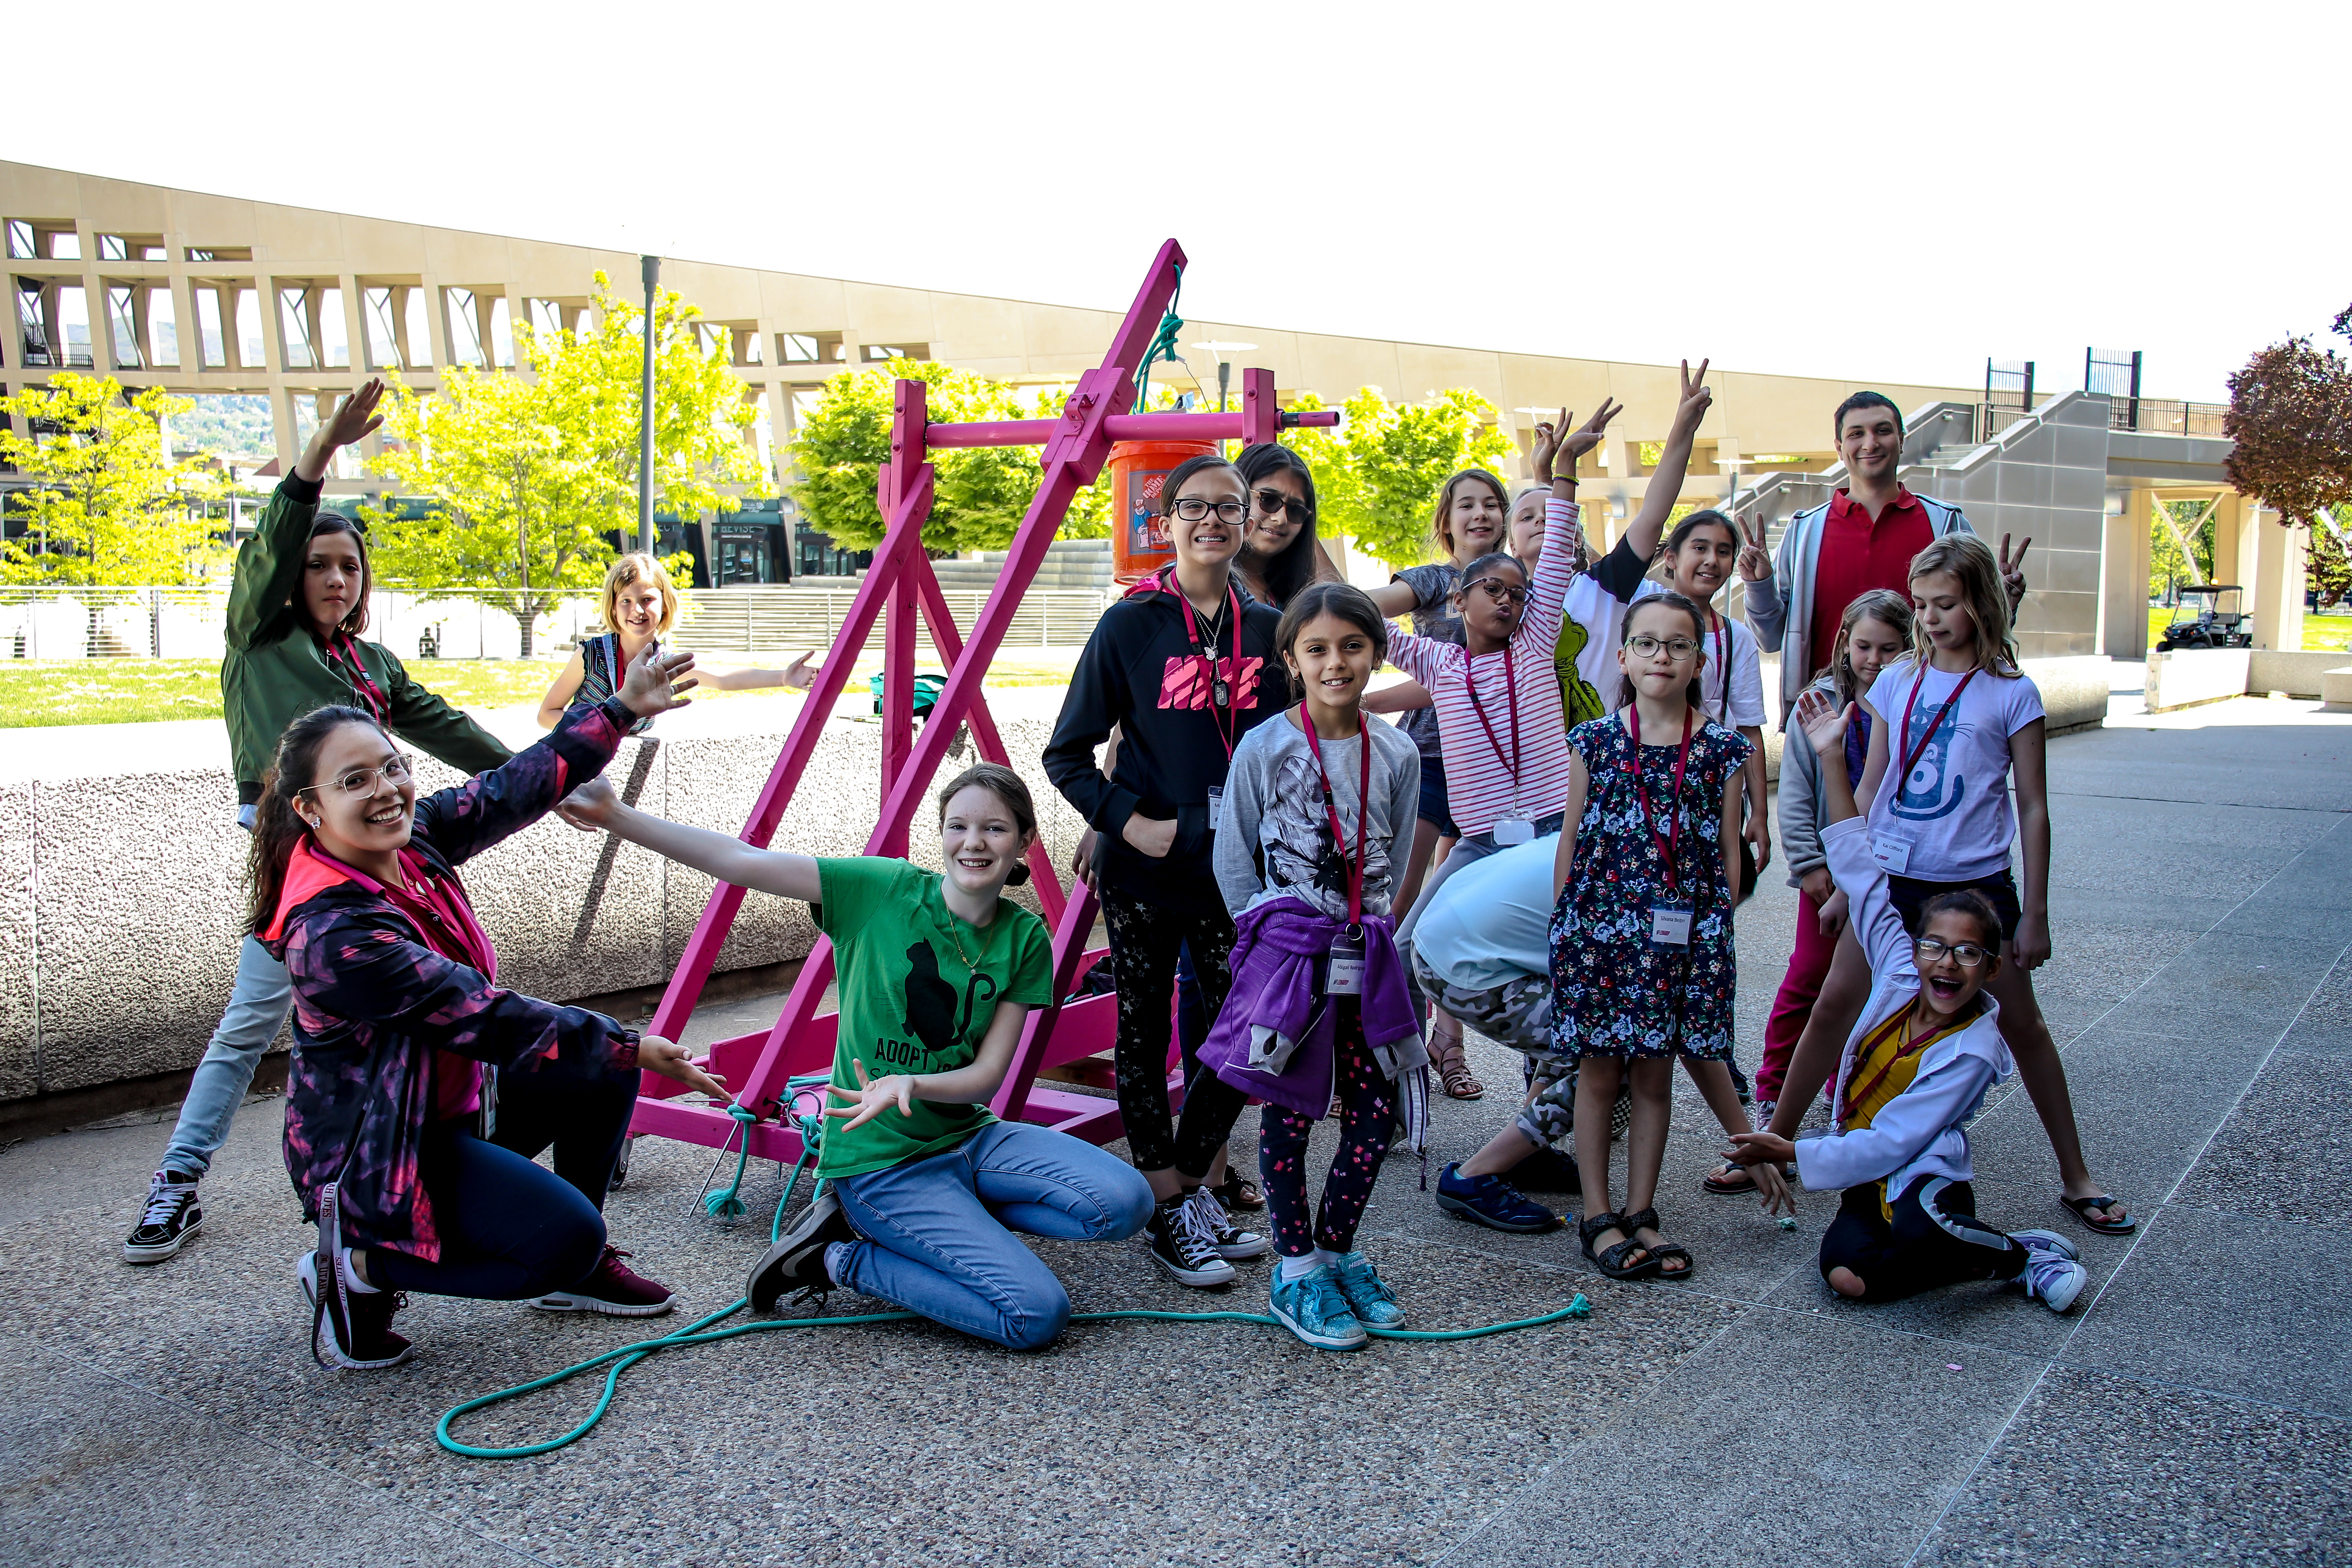
To congratulate the club on their hard work this season we wrapped up their final lesson by launching candy with a trebuchet!
The Leonardo Lesson Plan
BASIC Trebuchet
Lesson: BASIC Trebuchet
Ages: 3th – 6th Grades
Time: 1 hour
Content Areas: Computer Science, engineering, math, history
Overview: This lesson plan introduces students to the coding language BASIC. By using a BASIC coding website students can practice a little code and play a preloaded sample game called Trebuchet.
Materials required:
- computers at least 1 for every pair of students.
- Projector and screen to display images, video and to guide the coding lesson.
Optional:
- Trebuchet video playlist
- DIY trebuchet project (see activity materials and steps below)
Activity: What is BASIC?
Ask your students: Has anyone heard of the language BASIC? Discuss.
Before the 80s personal computers generally had their own software, hardware and programs that could not be run on interchangeable devices. That is until BASIC became the language that could be used on all of those different systems. BASIC stands for:
- Beginners
- All-Purpose
- Symbolic
- Instruction
- Code
It was taught in schools eventually and many computer owners could buy magazines and adventure books with programs they could type into their machines. Imagine if you wanted to play a game but had to enter all of the code into your computer before starting?!
Watch this video to learn more about BASIC and see it in action. You can opt for only playing the first 10 minutes of the video as that covers most of the content for our objective.
- Play Youtube video: The Basics of BASIC, the Programming Language of the 1980s by The 8-Bit Guy
- https://www.youtube.com/watch?v=seM9SqTsRG4
Now let’s try using BASIC ourselves. Open up this website:
- Quitebasic.com
- Next click samples > the basics > Hello World
Now let’s read through the sample lines. Notice how each line is numbered. After reading the lines ask your students to predict what will happen when the play button is pressed.
Honestly, nothing exciting happens but in terms of it’s historical context, this is accessible language and it is easy to pick up. Therefore, the print to screen is just a first step to understanding how code works. Ask your students to try coding their own phrase to print.
BASIC is not currently a language that is industry standard, this means it is not one of the codes we commonly use for the machines of today. Ask your students: Do you think it’s helpful to learn old code like this? Discuss.
Now it’s time to play a game. BASIC was most popular for programming games so of course we should have some fun with this. We’re going to play Trebuchet. Ask your students if they have ever heard of this machine. Write Trebuchet on a board in your classroom and/or project images of trebuchets to help your students understand the difference between this machine and a catapult.
A trebuchet is an ancient siege machine used throw payloads at an enemy’s fort such as a castle. Trebuchets are unlike catapults. Catapults use tension to throw whereas trebuchets use a counterweight, arm and a sling to throw. This machine is capable of customized settings for speed and angle of projection through adjusting the counterweight and a pin that is mounted on the end of the arm.
So let’s play the trebuchet game in QuiteBASIC. Click samples > games > trebuchet
Press the start button and observe the game setup. Notice the BASIC code used to program this game. How many lines is it? If you removed a line would the game still function? If you added a line what would happen? Discuss.
Before you begin entering speed take a look at the game canvas. The green dot is your trebuchet. The grey and red castle is your enemy’s territory. Now evaluate on a scale of 1 – 10, 10 being the fastest, how fast you want to throw your payload. Next on an angle of 0 – 90 about which path would you need the payload to take.
Discuss angle, draw diagram as needed. Additionally, hold your arms out in a right angle pose. Discuss your top arm pointing at 90 degrees and your bottom arm at 0 degrees. The closer your top arm moves to the bottom arm you decrease the number of degrees. You can practice this together as a classroom. Everyone can stand up and begin a 90-degree pose, then prompt the class to attempt a 50-degree pose and discuss what that might look like. This helps students make better educated guesses while choosing their angle of throwing.
Now play until you hit the target.
You can use quiteBASIC to make your own programs or fiddle with the samples at home, its free! Try adding lines to samples and see what happens or observe and play other sample games.
At The Leonardo we wrap up this lesson with a real trebuchet launching. There are lots of tutorials online about how to build your own at any scale. Build your own mini-trebuchet with this DIY.

Activity: Mini-Trebuchet DIY

Time: 30 minutes – 1 hour
Content Areas: engineering and history
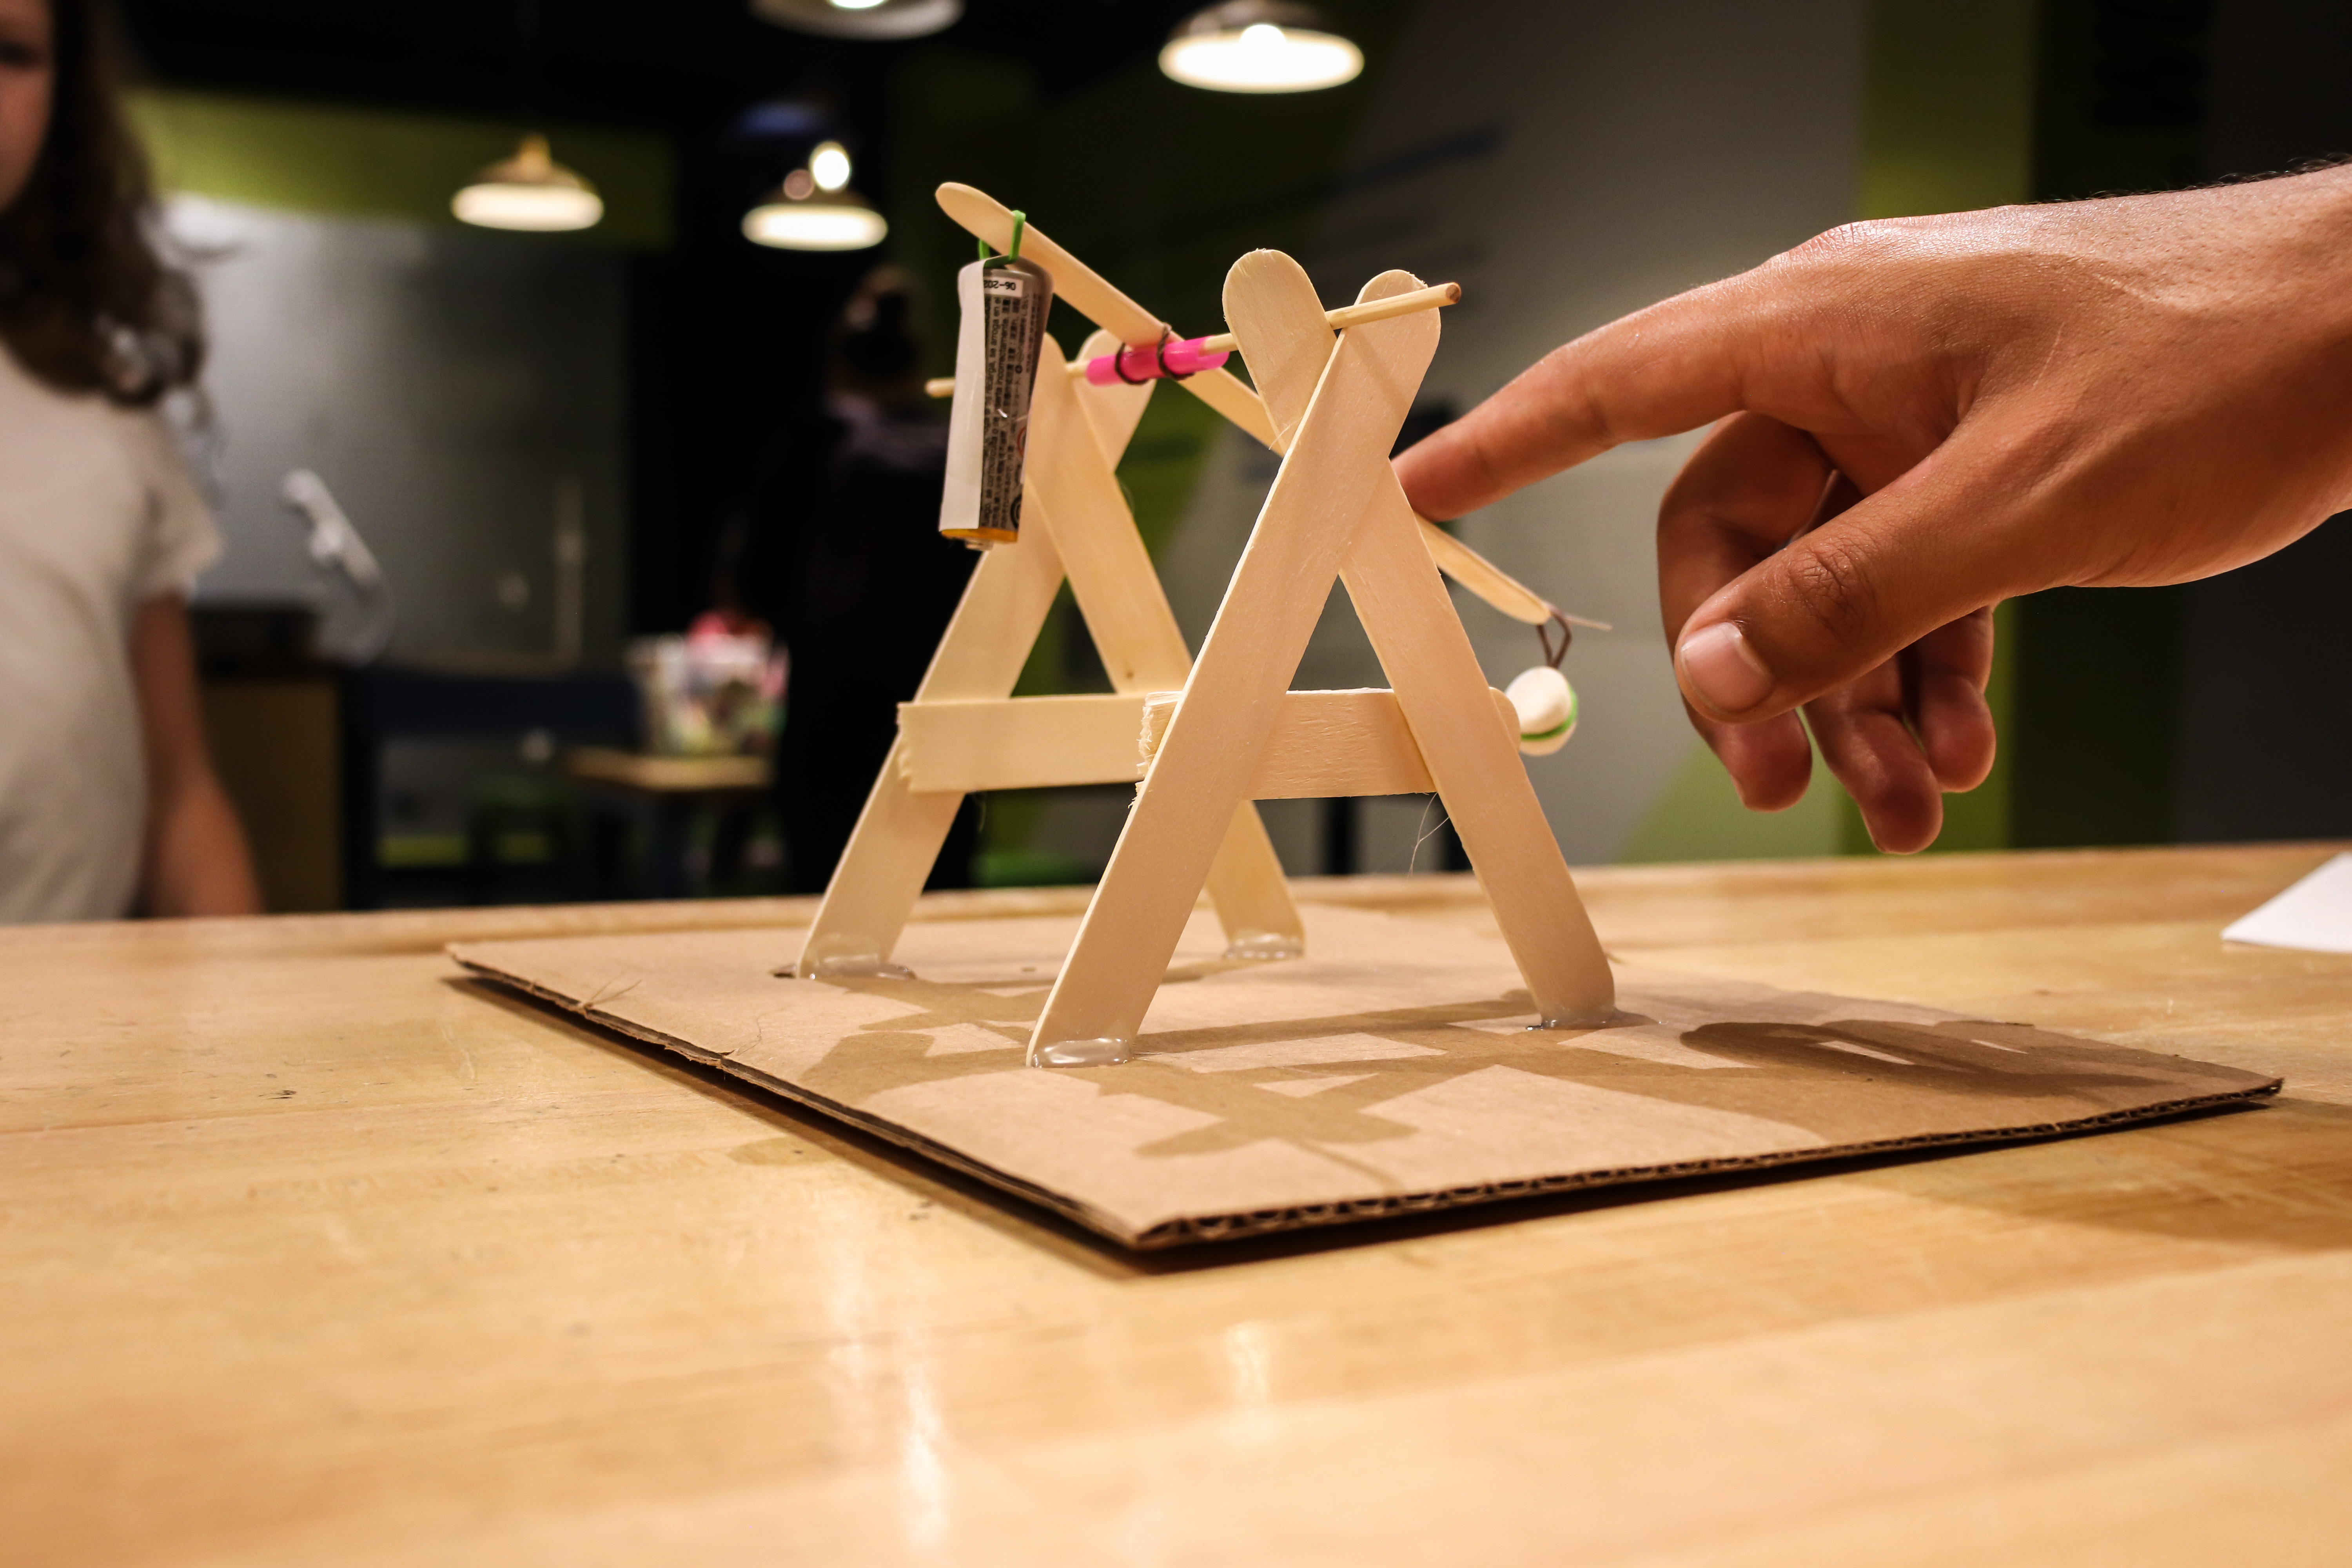
Overview: This activity uses principles of engineering to build a min-trebuchet or counter-weight type of catapult.
Materials required:
- 6 popsicle sticks
- 1 skewer
- 1 paperclip
- ¼ cut of a straw
- 4 small rubber bands
- 1 small strip of paper or string
- Tape
- Cardboard square cutout
- Hot glue
- Marshmallows
Step 1
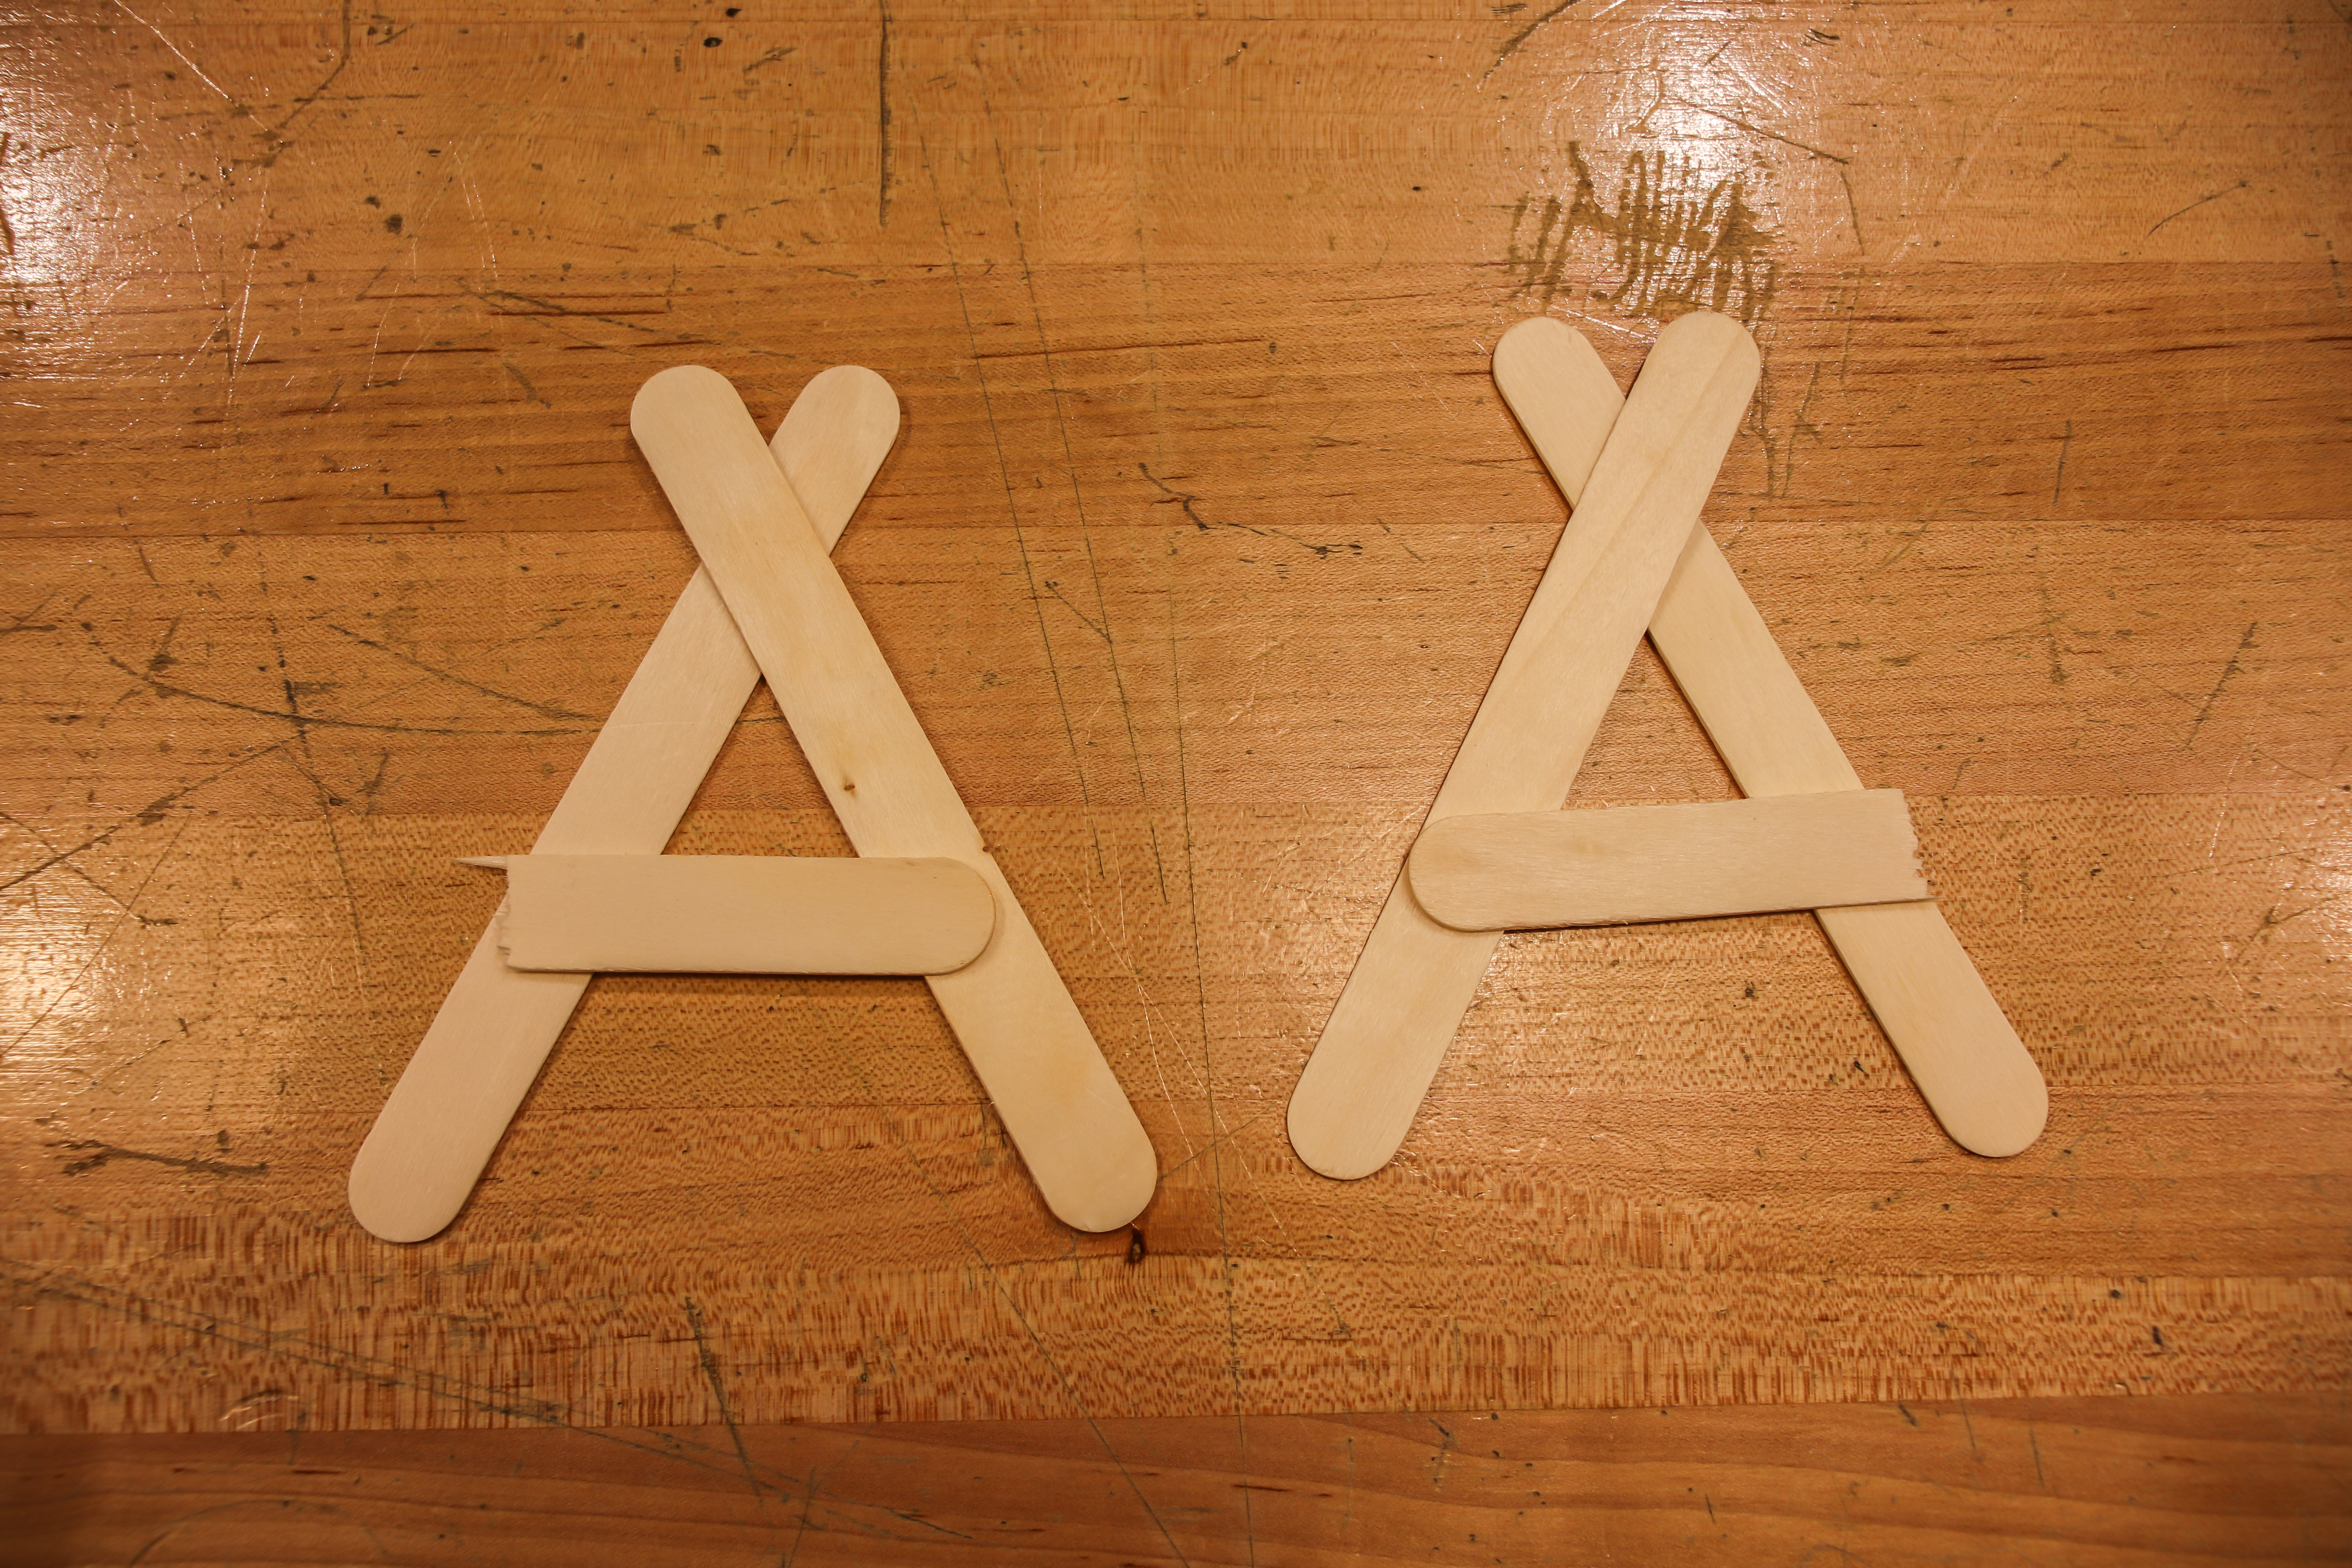
Start by assembling two A-Frames. Place 4 popsicle sticks crossing each other near the top, be sure to leave “v” shape room at the top. Break 1 popsicle stick in half and place each piece in the middle of each frame. Hot glue to the 2 frames.

Step 2
When you’re A-frames are done drying insert them into your square cut of cardboard. Take one frame and hold it up vertically on the cardboard, use a pencil to mark where the feet of the frame touch the cardboard. Use scissors to poke holes in those marks. Repeat this step with the other frame about 8 inches apart from the hole you poked. Now insert each frame into its slots and hot glue in place.
Step 3
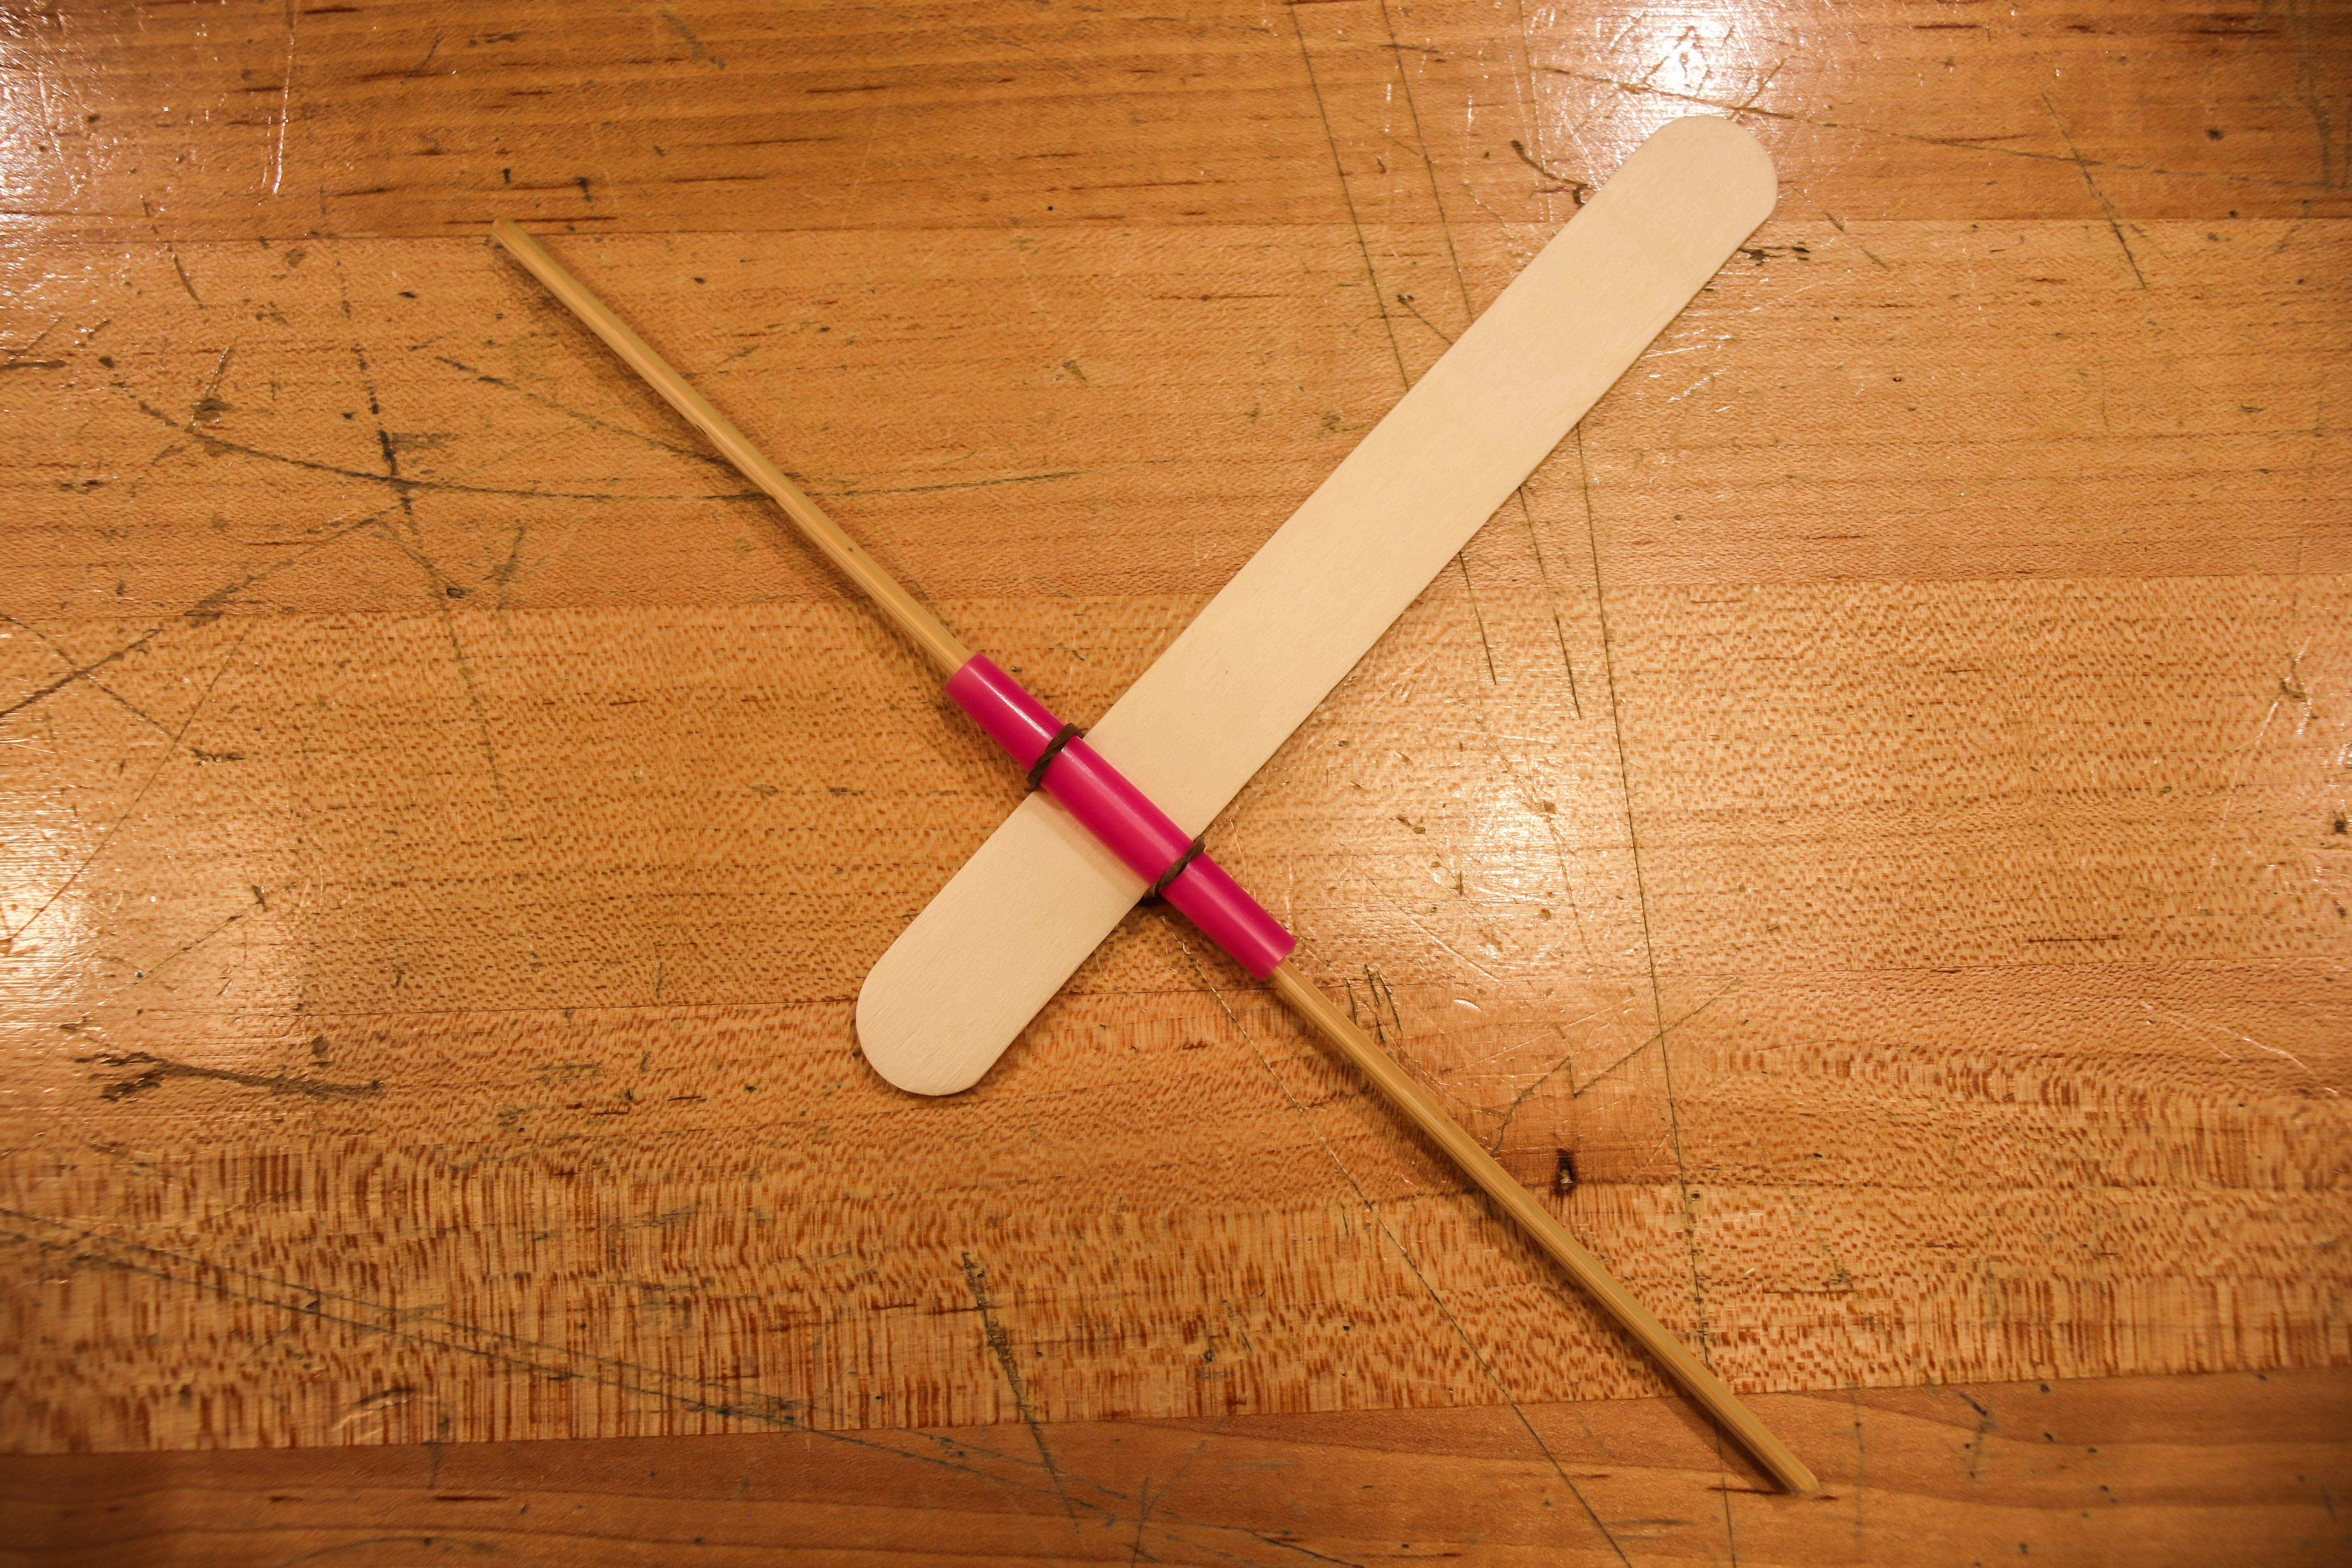
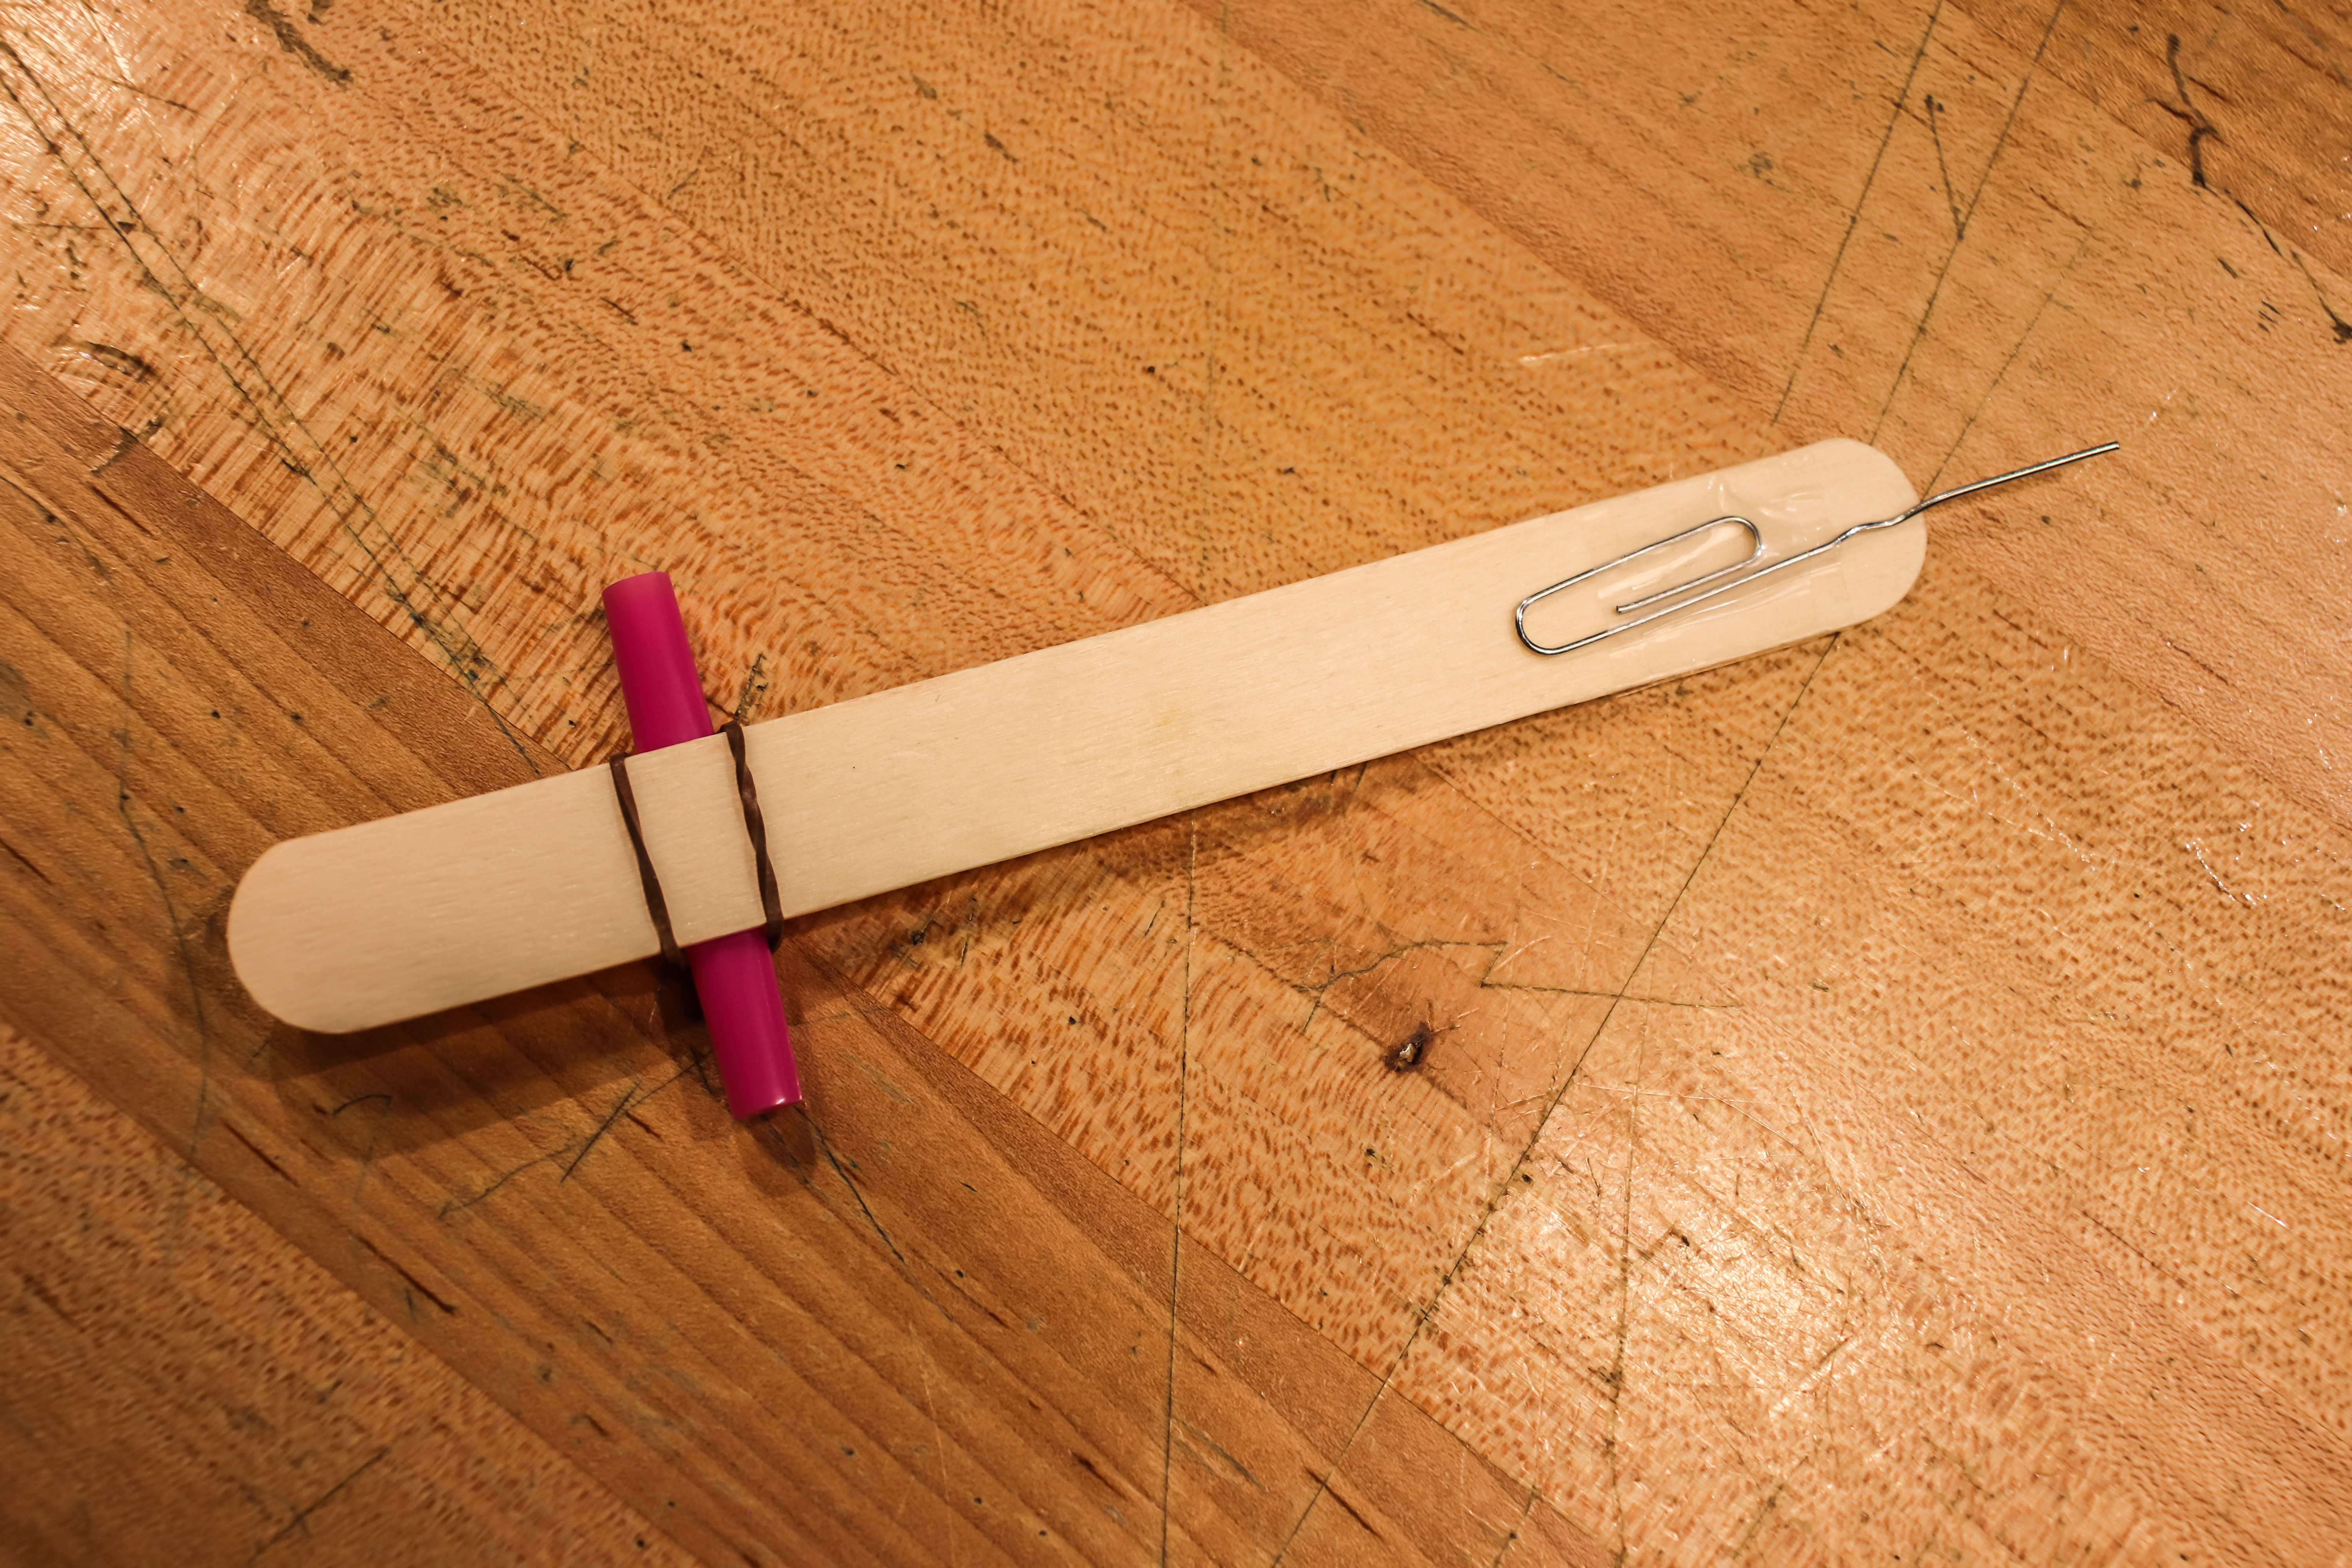
Cut a straw into quarters (the 4 pieces can be distributed among four students). Place one piece of straw on top of your last popsicle stick and secure with a rubber band. Now take a bamboo skewer and break off the sharp end. Thread the skewer through the straw.

Step 4
Take a paper clip and unbend one point. Tape the paper clip to the opposite end of the popsicle stick with the point sticking out.

Step 5
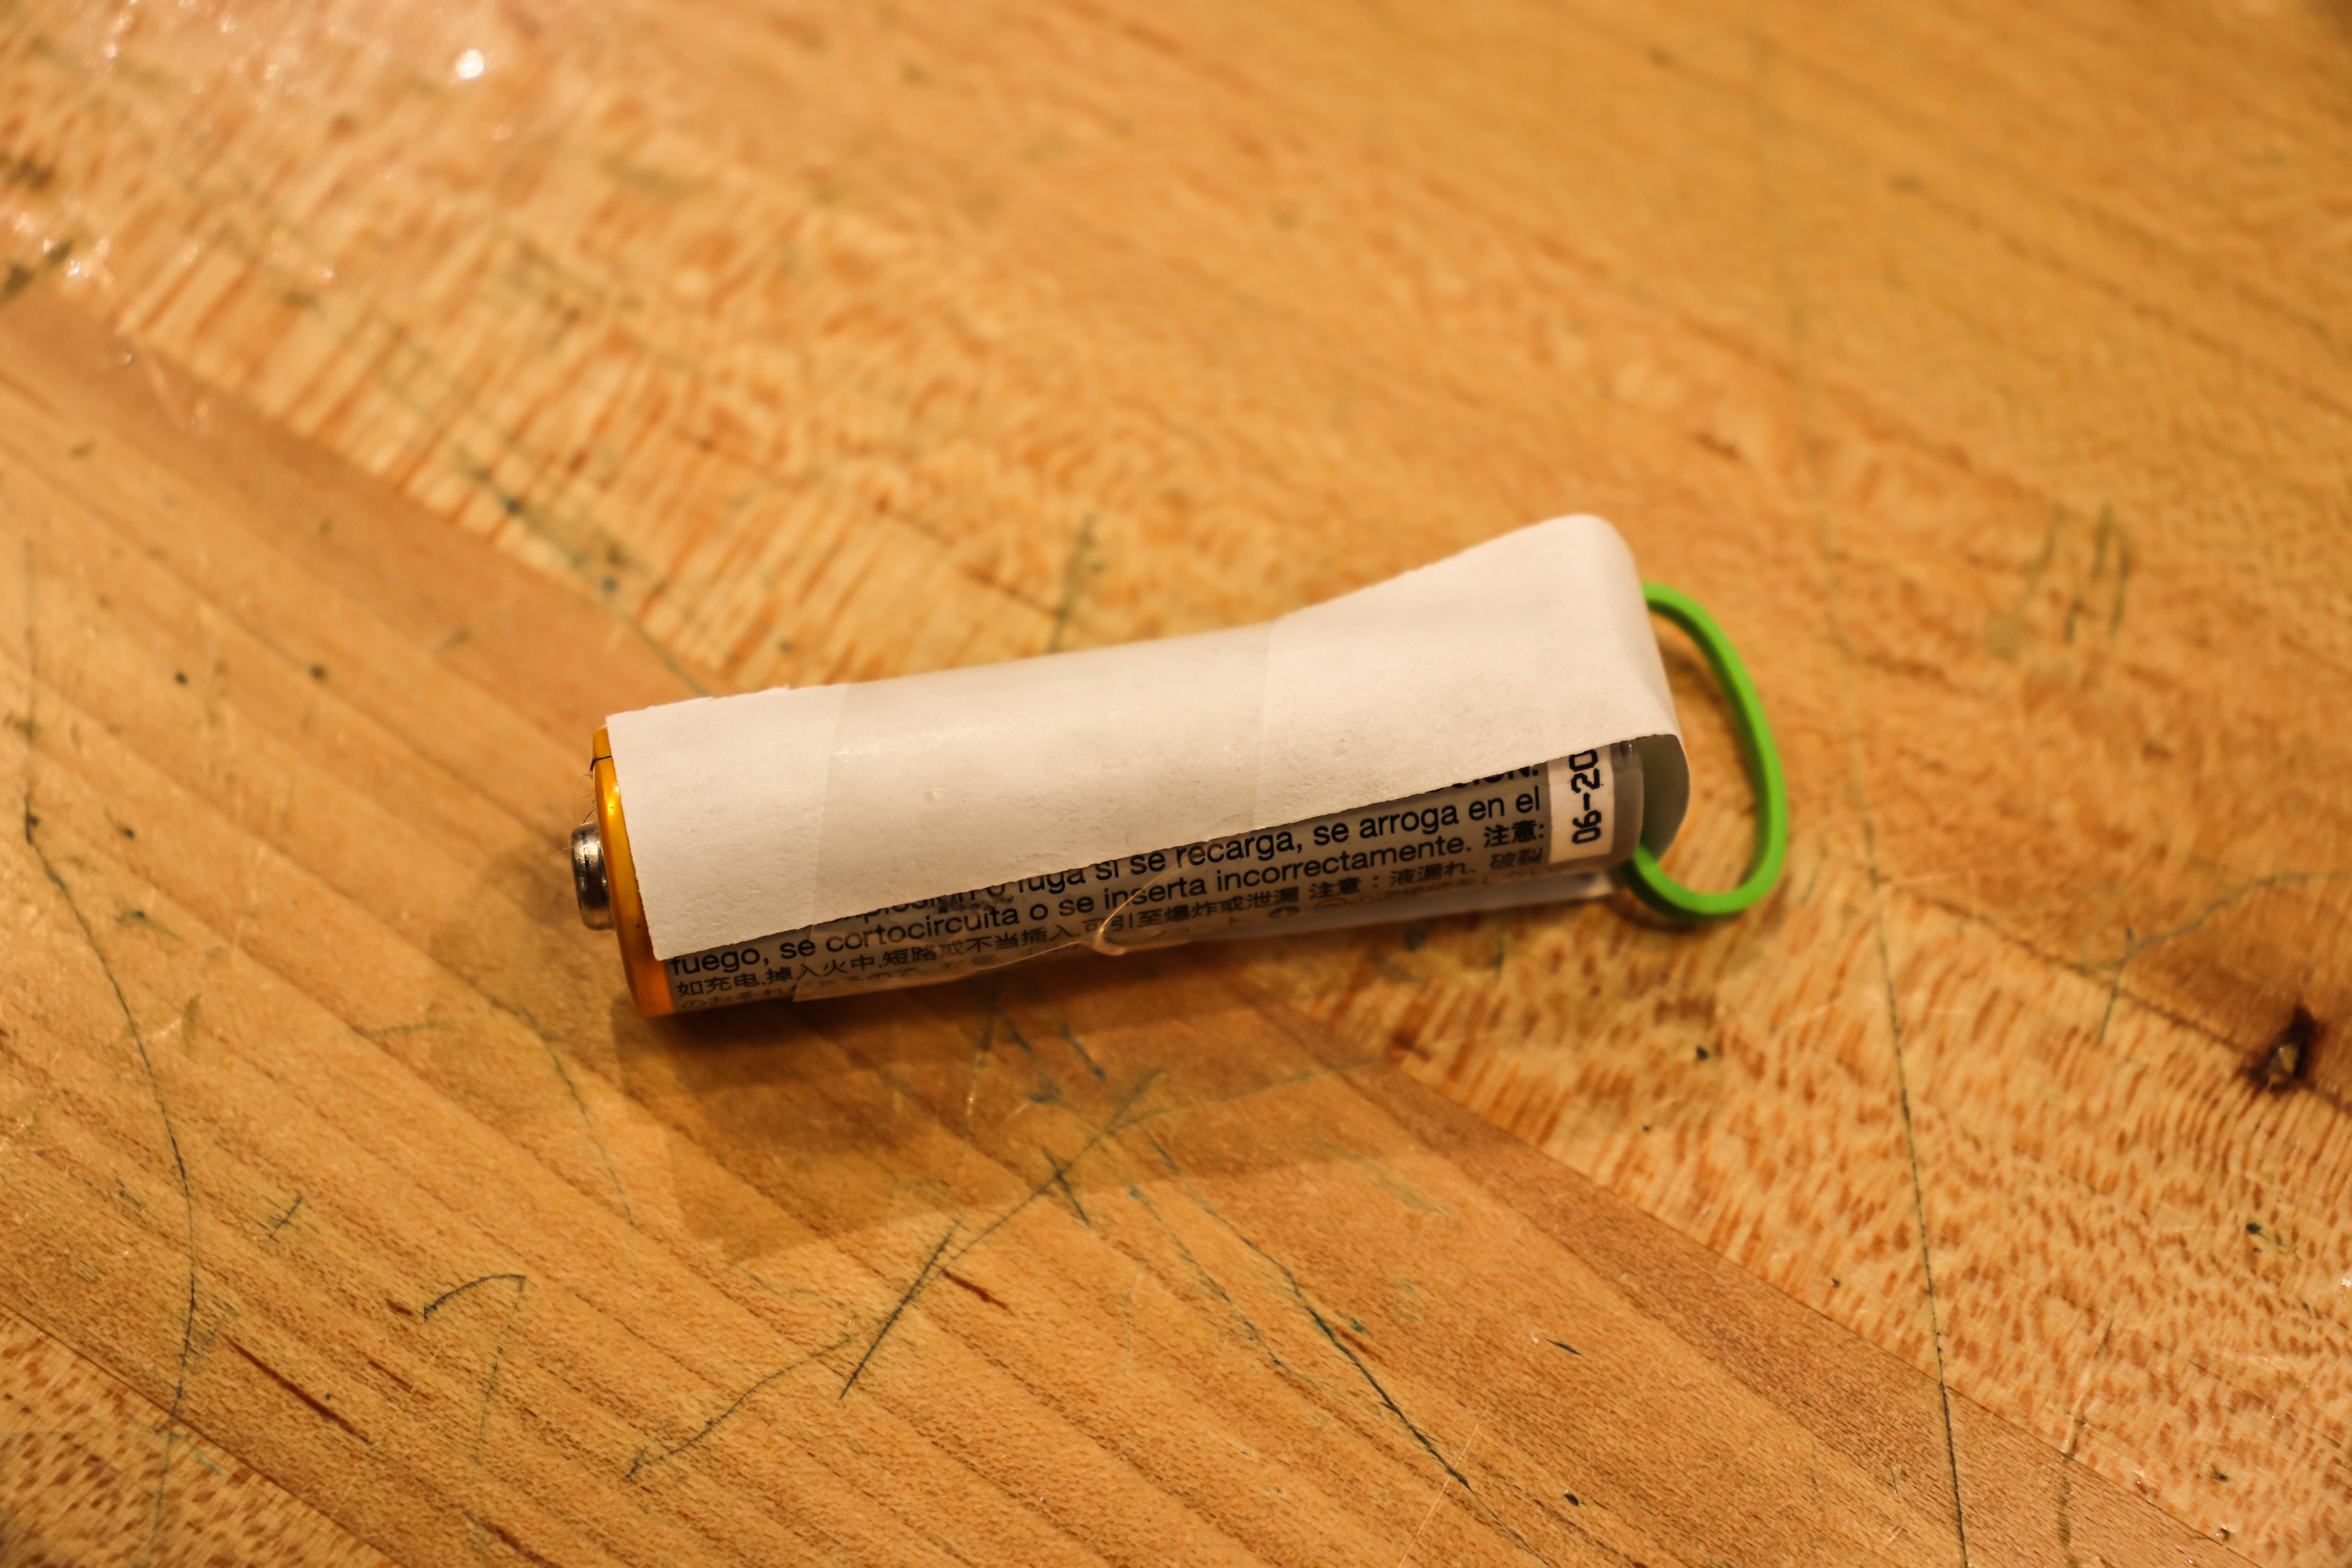
For this step we used a strip of paper but you can use a string too. Thread the strip or string through a small rubber band and tape each side of the strip to a battery. This step can be done with an old battery, this activity doesn’t require power, batteries are just a great counterweight for this machine.

Step 6
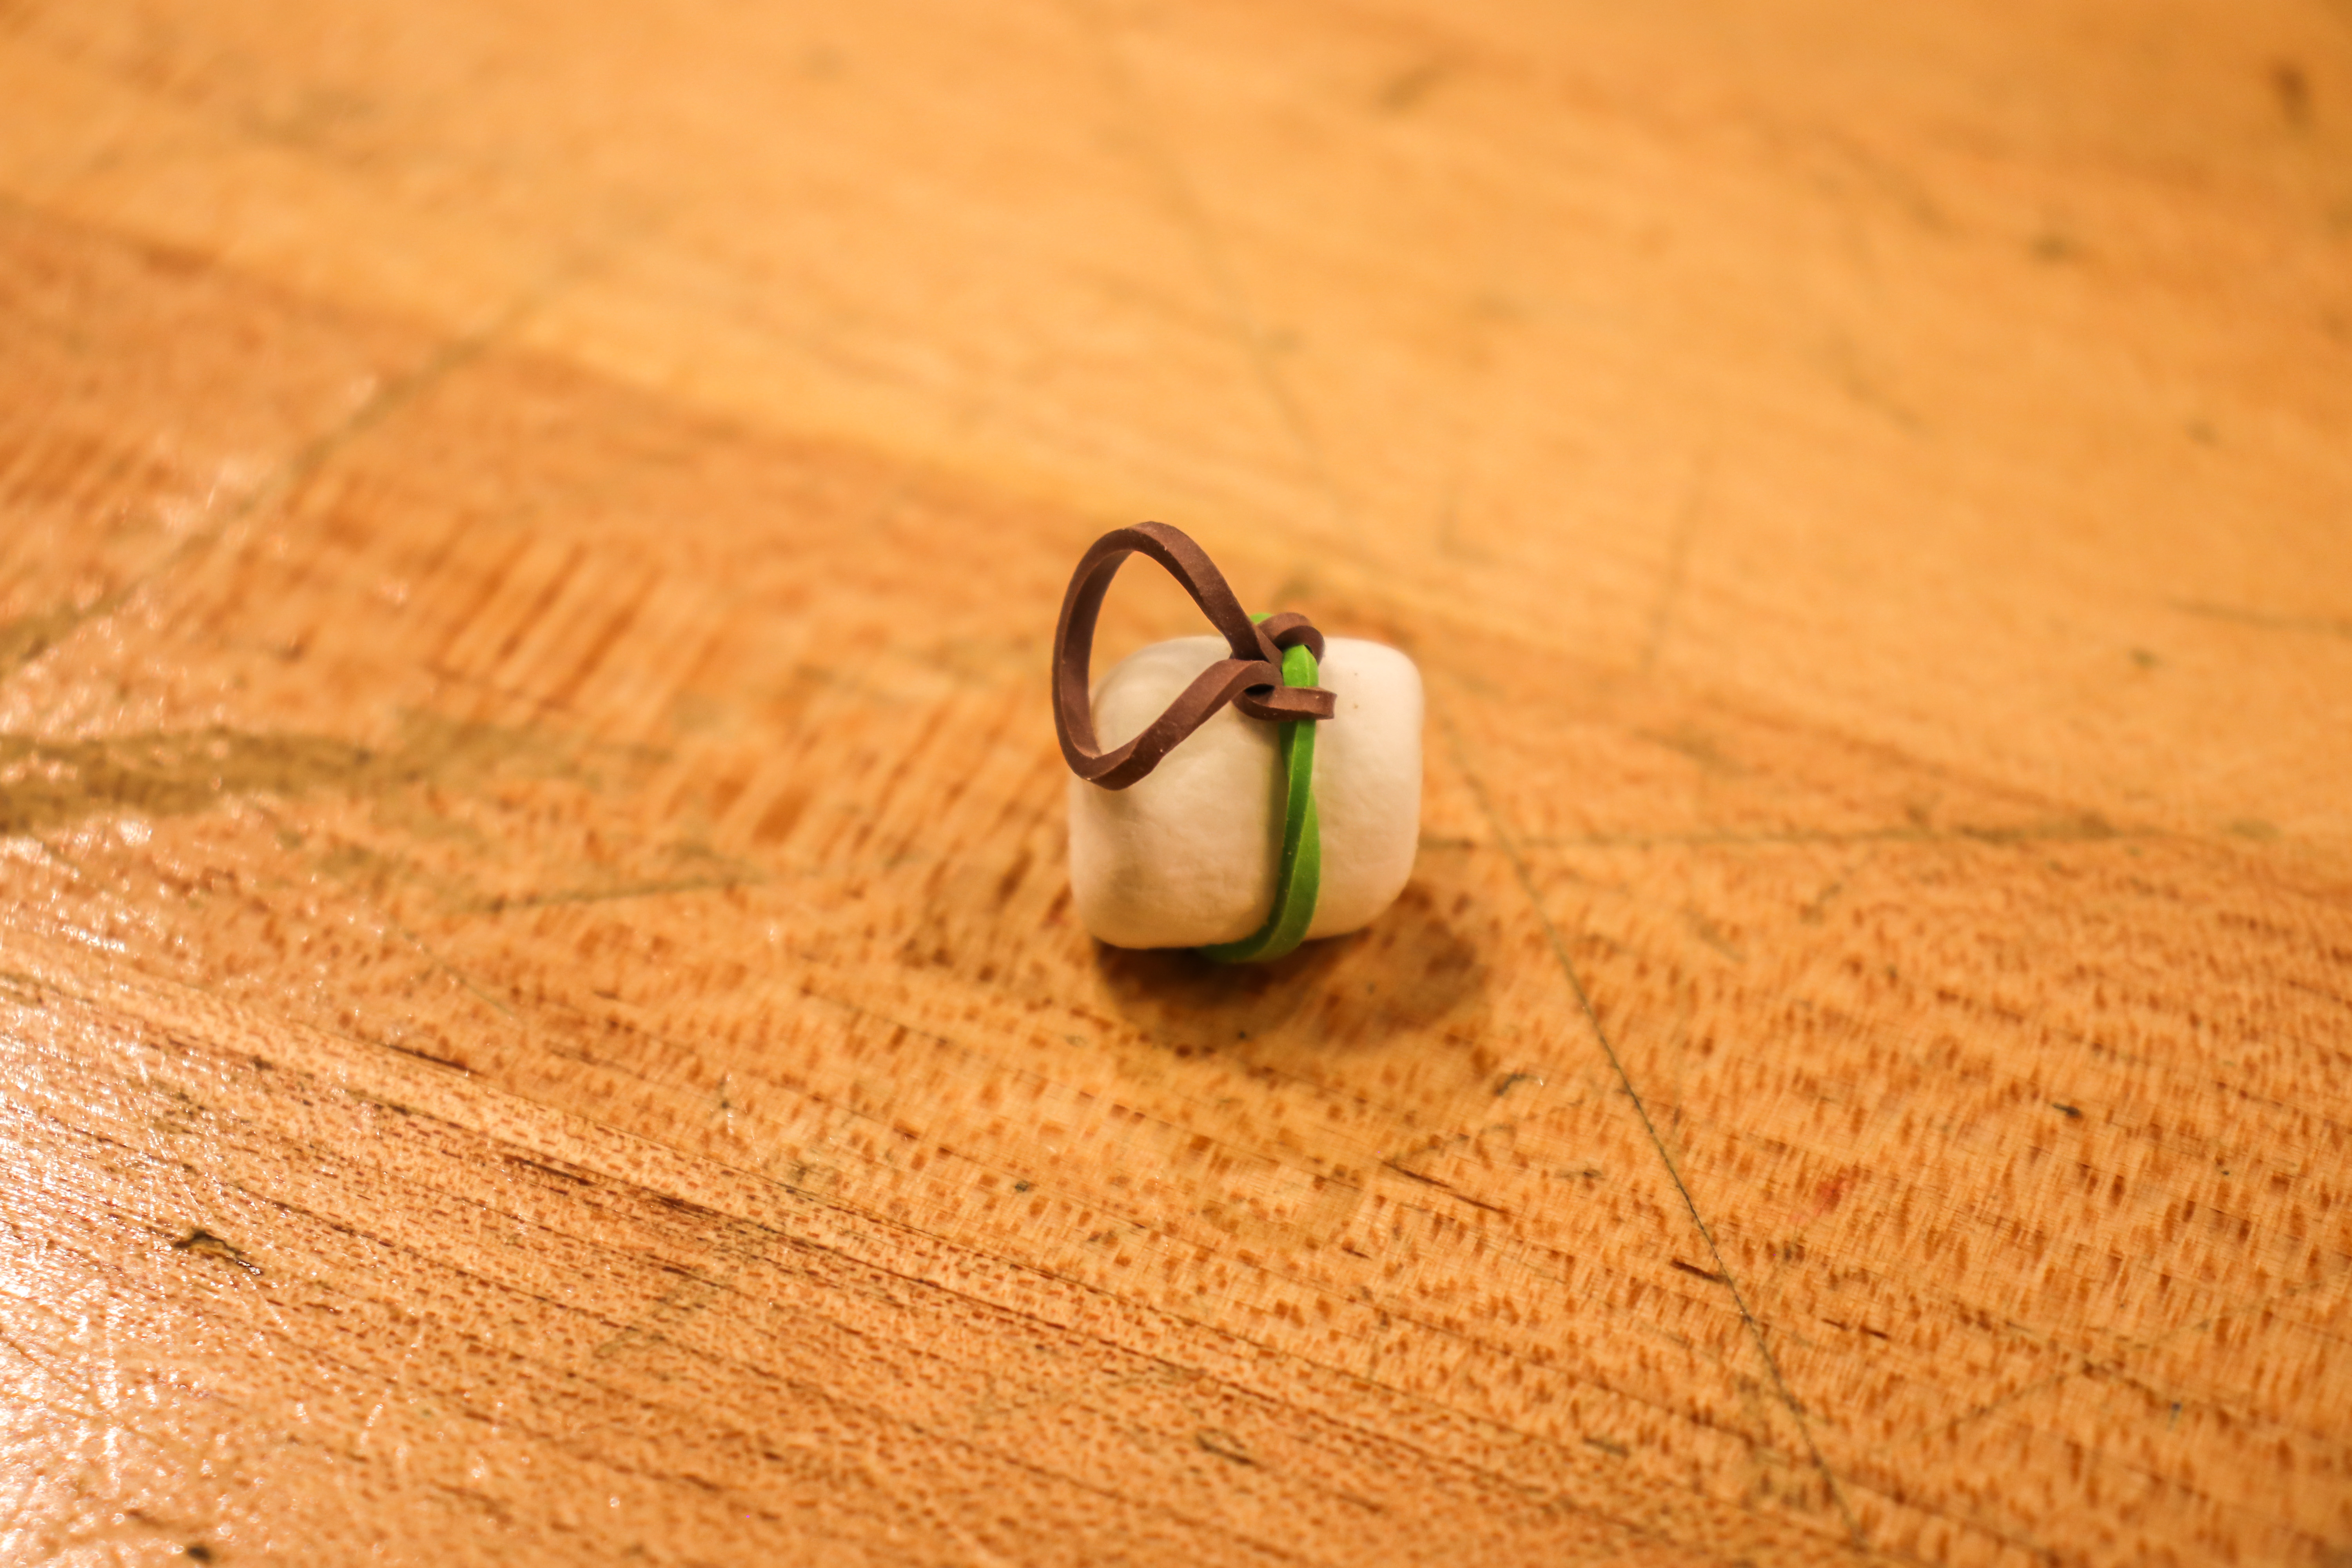
Loop one small rubber band through another small rubber band. Then wrap one rubber band around a mini-marshmallow. This is your payload.

Step 7
To assemble all parts, begin by looping the rubber band of the battery on to the short end of your popsicle stick arm. Then place the arm on the A-frames. Loosely set the rubber band of the marshmallow onto the pin that is sticking out of the arm.
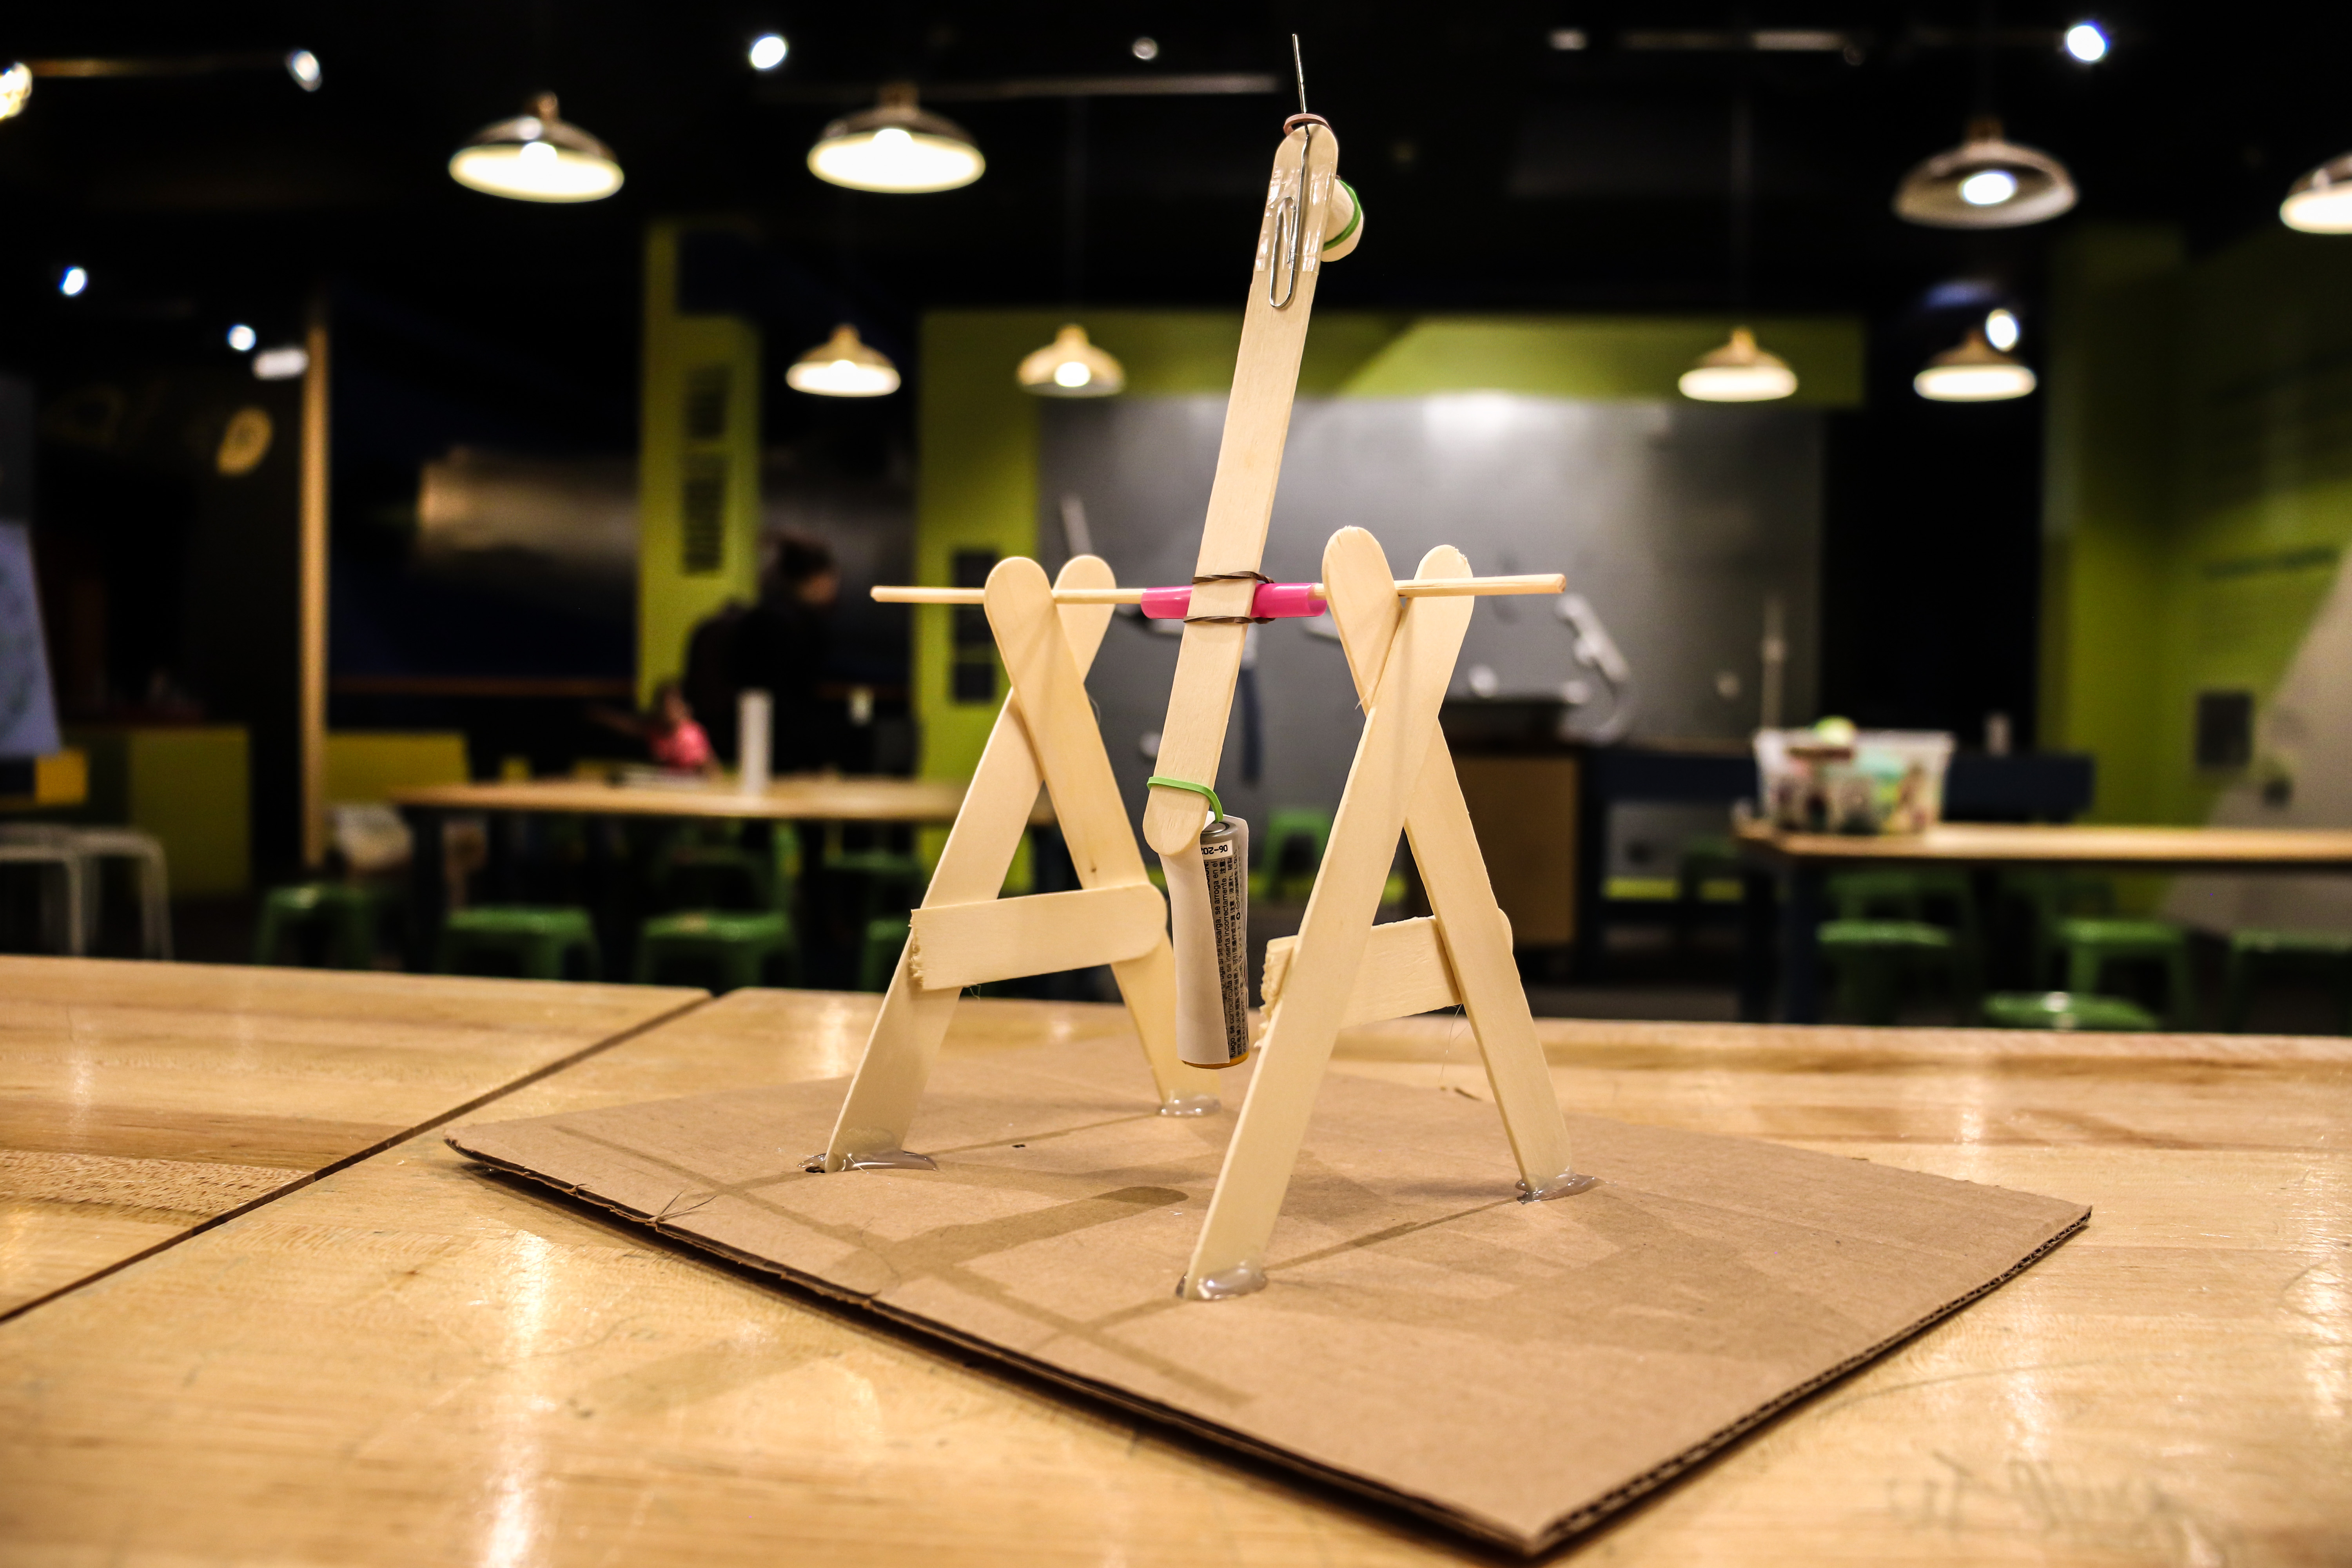

To launch, gently hold down the popsicle stick arm on the marshmallow payload side and let go!
Now you have a Mini-Trebuchet Marshmallow Launcher!


Code at Level-Up Summer Camp!
Learn more about Level-Up and The Leonardo Summer Camps

